
FILE SPLIT ‘N’ JOIN
TOOL
OVERVIEW
Ever try to send a large file as an e-mail attachment and had your e-mail program refuse? No more. This utility accepts a queue of large files from your hard drive and breaks them into smaller files of pre-determined sizes, encrypting them, if you so desire using Blowfish Encryption with either a shared key or a public/private key option.
Used standalone, the program will output a series of file chunks which you can manually attach to e-mails with your favorite e-mail tool and send. The recipient, using this same utility, can detach all of the file chunks into a common folder on their hard drive and then re-join them in a matter of seconds.
But the real power comes when the program is integrated with TET – our Text Encryption tool, which manages an address book with public keys of all your contacts. When you set up TET configuration, you can tell it if you have the File Split and Join Tool and where to find it. Then, if you access this tool through the Text Encryption tool, which also can be integrated to Outlook, this program will automatically create an e-mail with each file chunk attached, saving time and effort for the sender.
Besides E-mail, this program can be used to simply encrypt files without breaking them up, or to break up files for other purposes—such as spreading a DVD across multiple CD for archive purposes.
The Program utilizes Blowfish Encryption © David Ireland, DI Management Services Pty Ltd <http://www.di-mgt.com.au>.
The program was written using Visual Studio 2008 and
requires that you have Windows .Net Framework 2.0 installed. The .Net framework provides a replacement for
the older windows API interface and provides a feature rich, secure environment
for program development. Get your free
copy directly from Microsoft--here: Click.
Although all our programs use Blowfish encryption, it is not compatible with other implementations, and we do not even guarantee compatibility with prior or future releases of this or the Text Encryption Tool. Therefore, all the persons who will be sharing encrypted messages or files must be running the same version at the same time.
INSTALLATION
Just run the program, and it will lead you through the auto install with the following prompt:
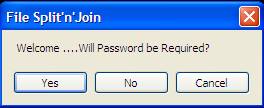
‘Yes’ means that anyone who tries to run the program on this computer will have to enter a password that is assigned by you. This prevents access to the program by just anyone.
Installation is now complete. If you ever want to re-install it, so you can delete a password or add a password, there is a button on the main screen called “Uninstall”.
USING FILE SPLIT ‘N’
JOIN
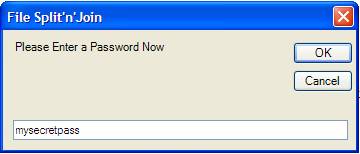
If you require a password, this is the next screen; put in the password

If you do not require a password, you will see the same screen, but with no input fields (called a splash screen), and it will go away in 5 seconds…
You will then come to this screen, which is the main working screen for all features of the program. Program is now ready for use:
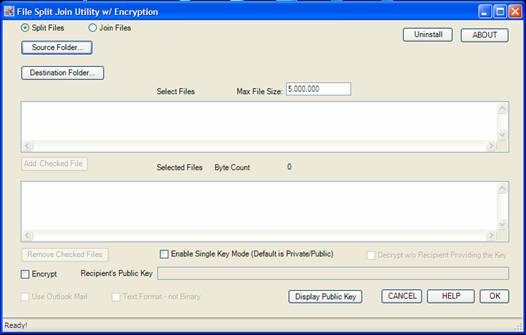
You should proceed from top to bottom and from left to right, configuring the program to process your files as follows:
Split Files or Join Files – tell the program what you want it to do in this session. If you just want to encrypt a file, select Split Files and then set the Max. File Size larger than the largest file you want to encrypt.
Source Folder- activates a browser to select the folder on your computer the files to process are stored.
Destination Folder- activates a browser to select a temporary work folder to store the file chunks in.
Max File Size – tell
the system in bytes, how large to make each file chunk.
Select Files Area – Once
the source folder has been identified, the files which can be added to the
queue will be listed here. Click on them
to select and then click the Add Checked File to add the file to the processing
queue
Selected Files Area – this section of the form lists all the files that are currently in the queue. Click on them to select and then click Remove Checked File to remove them from the processing queue
Encrypt – check this if you want the program to encrypt the files.
Enable Single Key Mode – this program has two modes for obtaining ciphers for encryption. Single key mode requires that you and the person receiving your files share a commonly known password. You use the password as a cipher key to encrypt the files, and they use it to decrypt the files. The default however, is the public/private key mode. In this mode, your recipient would provide you, in advance with their public key, which you would enter here to encrypt the files. In this mode, only the private key can decrypt the file, and the two keys are not the same Since a public key can only encrypt files, it is perfectly safe to share it. In this mode, each recipient would have their own key pair and you would have to encrypt the batch multiple times—once under each key.
Display Public Key –
this button activates a small utility to generate a public key for
you. It assumes that whatever text you
place in the text field “Recipients
Public Key” is actually a private key, and it will generate a public key
from that key for you. Text Encryption Tool provides another
method of computing public keys from private keys that is fully compatible with
this program. This program uses a
proprietary method to create public/private key pairs, so pairs created by
other programs will not work. Once you
have the public key, you would replace the text in the Recipients Public Key field with the public key.
Cipher keys can be
any character, and are case sensitive.
Decrypt without the recipient providing a key – in cases where your primary concern is protecting the files “in transit”, you can tell the program to automatically decrypt the files without asking the recipient for their cipher key. If this feature is enabled, anyone who has this program AND access to all the files will be able to join them and decrypt them.
OK – this button initiates the processing of the files selected above using the features selected above.
CANCEL – this button is used to exit the program without performing any actions.
On the very bottom of the screen is a status/activity bar. When the program is processing, it will display messages there.
When the file(s) are broken into chunks, they will be named “File-YYYYMMDD-time.a## where the YYYYMMDD is the date, time is the time, and ## is the series number of the chunk. In addition to these files, the system will also create and send a packing list file (packing.lst). This file must be emailed to the recipient, because it contains important information that tells the program how to process the files for the recipient.
When the processing is completed, the program will reset itself and return to this menu, ready for the next processing session!
Questions/Comments can be addressed to info@never2busy.com
Visit our Web Site: http://www.never2busy.com